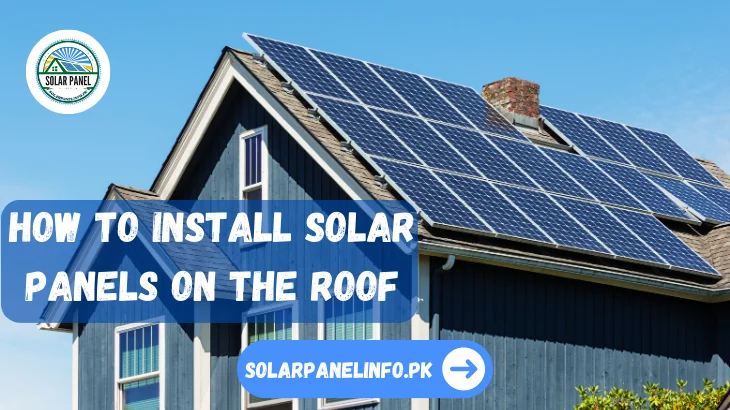
How to Install Solar Panels on the Roof
Installing solar panels on roofs offers significant economic and environmental benefits, such as reducing carbon emissions and lowering electricity bills. The process involves careful planning and consideration of the roof’s angle and size. While the installation may seem challenging, it is manageable with a clear understanding of the steps involved. This guide outlines a step-by-step approach to successfully installing solar rooftop panels. Here, we will discuss how to Install Solar Panels on the Roof.
Read more: Solar panel installation plan
چھتوں پر سولر پینلز کی تنصیب اہم اقتصادی اور ماحولیاتی فوائد پیش کرتی ہے، جیسے کاربن کے اخراج کو کم کرنا اور بجلی کے بلوں کو کم کرنا۔ اس عمل میں محتاط منصوبہ بندی اور چھت کے زاویہ اور سائز پر غور کرنا شامل ہے۔ اگرچہ انسٹالیشن مشکل لگ سکتی ہے، لیکن اس میں شامل اقدامات کی واضح تفہیم کے ساتھ یہ قابل انتظام ہے۔ یہ گائیڈ سولر روف ٹاپ پینلز کو کامیابی کے ساتھ انسٹال کرنے کے لیے ایک مرحلہ وار طریقہ بتاتا ہے۔
A Step-by-Step Guide to Installing Solar Panels on the Roof
Step 1: Identify the Roof Space(چھت کی جگہ کی شناخت کریں)
Solar rooftop panels are installed using solar mounts. Identifying the area for solar panel installation helps determine how many solar mounts you need. Also, while identifying the total rooftop area, you can specify the extent of the shade-free area.
Step 2: Inquire the Roof Condition(چھت کی حالت دریافت کریں)
Ascertain the endurance capacity of the roof, as the solar panels are bound to weigh heavily on it. To avoid a collapse, you must inquire into the durability of your roof. Also, ensure cleanliness and orderliness for effortless solar rooftop installation.
Step 3: Ensure Proper Transmission of Conduit(نالی کی مناسب ترسیل کو یقینی بنائیں)
Solar conduits are electrical wires that run from your solar panels (solar conduits) to your house. Make sure these solar conduits run properly across the roof before attempting solar rooftop installation to avoid short circuits or damage.
Step 4: Establish a Solar Platform(سولر پلیٹ فارم قائم کریں)
Solar rooftop panels stand on solar platforms. A powerfully built solar platform will ensure ease of solar panel installation. A sturdy solar platform will support, shield, and stabilize solar panels, allowing them to make the most of the available sunlight without damage or impairment.
Step 5: Arrange the Solar Rooftop Panels(سولر روف ٹاپ پینلز کو ترتیب دیں)
Arrange the solar panels according to the decided directions. By arranging the panels and ensuring their association, you can identify the required number of solar panels in a row.
Step 6: Link Solar Panels with Solar Inverter(سولر پینلز کو سولر انورٹر سے جوڑیں)
Connecting solar panels and solar inverters requires your meticulous attention and requires you to switch off the inverter during installation. Ensure the solar panel’s positive wire is connected to the positive end of the inverter. Similarly, connect the solar panel’s negative wire to the inverter’s negative end. The solar panel’s output series must also be connected to the inverter’s input. Renogy’s 3500W 48V Solar Inverter Charger is a powerful solution that combines solar charging, AC/generator battery charging, and battery inverting into one and takes an off-grid system to the hybrid level.
Step 7: Link with Battery & Home Electricity(بیٹری اور گھر کی بجلی کے ساتھ لنک کریں)
While connecting the solar inverter and the battery, connect the positive end of the inverter to the battery’s positive terminal and reciprocate for the negative terminal. An accurate connection will ensure the proper recharging of the grids and solar panels. Further, to link the solar inverter to the home electricity, plug in the main switch on the board, and the output wire will distribute the electricity throughout your house.
Step 8: Ensure Analytical Testing & Activation(تجزیاتی جانچ اور ایکٹیویشن کو یقینی بنائیں)
In the final testing phase of your solar rooftop installation process, ensure that all electrical connections are correctly made. During the final test, ensure an analytical inspection to avert any short-circuiting and damage. After analytical testing, activate the solar panel and consider checking if all panels are up and running. Being well-informed and awake throughout the installation of solar panels on the roof will ensure ease and effectiveness in installation and the best outcomes.
How to Install Solar Panels on Different Types of Rooftops
Installing solar panels on various kinds of rooftops needs careful consideration of the roof’s material, form, and adaptation. Here’s a general guide for installing solar panels on various kinds of rooftops:
Metal Roof:(دھاتی چھت)
Metal roofs, smoother to work on, require specialized clamps for mounting hardware. Clamps shouldn’t pierce the roof; seal them to prevent water seepage. Install panels securely.
Tile Roof:(ٹائل کی چھت)
Tile roofs are fragile and need specific flashing and hardware. Hooks or brackets fit beneath tiles. Carefully replace tiles as needed. Install panels securely, without tile damage. Seal mounting points to prevent leaks.
Flat Roof:(فلیٹ چھت)
Installed ballasted racking systems for flat roofs, securing panels per instructions. Place ballast blocks or weights for stability. Connect panels and route wiring to the inverter.
Tools and Materials Needed for Installing Solar Panels
- Before You Get a Toolbox
- Screwdrivers
- Hammer
- Tape Measure
- Pliers
- Utility Knives and Extra Blades
- Adjustable Wrenches
- Level
- Putty Knife
- Straight Edge
- Square
- Flashlight
- File
- Safety Equipment: Glass
- Power Drill
- Saw Horses
- Combination Wrenches
- Clamps
- Shop Vacum
- Grease Gum
- Tools Beyond the Basics
Maintenance and Troubleshooting of Solar Panels
Regular Maintenance Tips
- Clean the Panels – Remove dust, dirt, and debris every–6 months to maintain performance. Use a soft brush, water, and mild soap if required.
- Inspect for Damage – Check for cracks, loose links, or physical damage to the panels, mounting system, and wiring.
- Monitor Energy Output – Use a solar monitoring system to track performance. A sudden drop in output could indicate an issue.
- Check Inverter Status – Ensure the inverter displays normal operation lights and codes.
- Trim Nearby Trees – Prevent shading that can reduce panel efficiency.
- Secure Mounting System – Strengthen any loose bolts or brackets to withstand strong winds and weather conditions.
Advantages of Installing Solar Panels on the Roof
Here are some key advantages of installing solar panels on your roof:
Fewer Electricity Bills:(بجلی کے کم بل)
Solar panels create free electricity from the sun, remarkably lowering your monthly energy costs.
Excess energy can be sold back to the grid in some areas through net metering.
Environmentally Friendly:(ماحول دوست)
Solar energy is a clean, renewable source that reduces carbon emissions.
Helps combat climate change by reducing dependence on fossil fuels.
Increases Property Value:
Homes with solar panels are likely to have higher resale values.
Many buyers are willing to pay more for a home with lower energy costs.
Energy Independence:(توانائی کی آزادی)
Reduces reliance on utility companies and fluctuating energy prices.
With battery storage, you can have power even during outages.
Government Incentives and Tax Benefits:(حکومتی مراعات اور ٹیکس فوائد)
Many governments offer tax credits, rebates, and incentives to make solar installation more affordable. It can significantly reduce the upfront cost of installation.
Conclusion
Installing solar panels on your roof is an excellent way to decrease your electricity expenses, reduce your ecological footprint, and increase your property’s worth. By adhering to the correct procedures and verifying that the roof is in appropriate condition, you can effectively utilize solar energy. Proper installation and upkeep will guarantee the durability and performance of your solar system, providing you with long-term advantages. Regardless of whether you have a metal, tile, or flat roof, paying close attention to the installation process and employing the right tools and equipment will contribute to a successful solar energy installation.
اپنی چھت پر سولر پینل لگانا آپ کے بجلی کے اخراجات کو کم کرنے، آپ کے ماحولیاتی اثرات کو کم کرنے اور اپنی جائیداد کی قیمت بڑھانے کا ایک بہترین طریقہ ہے۔ صحیح طریقہ کار پر عمل کرتے ہوئے اور اس بات کی تصدیق کر کے کہ چھت مناسب حالت میں ہے، آپ شمسی توانائی کو مؤثر طریقے سے استعمال کر سکتے ہیں۔ مناسب تنصیب اور دیکھ بھال آپ کے نظام شمسی کے استحکام اور کارکردگی کی ضمانت دے گی، جو آپ کو طویل مدتی فوائد فراہم کرے گی۔ اس سے قطع نظر کہ آپ کے پاس دھات، ٹائل یا فلیٹ چھت ہے، تنصیب کے عمل پر پوری توجہ دینا اور صحیح آلات اور آلات کا استعمال شمسی توانائی کی کامیاب تنصیب میں معاون ثابت ہوگا۔
FAQ’s
How long do solar panels last?
Solar panels typically last around 25–30 years with proper maintenance.
Can solar panels work in cloudy weather?
Solar panels can generate electricity even in cloudy weather, but their efficiency will be reduced.
Are there any tax benefits for installing solar panels?
Many governments provide tax credits, rebates, and incentives to make solar installation more affordable.